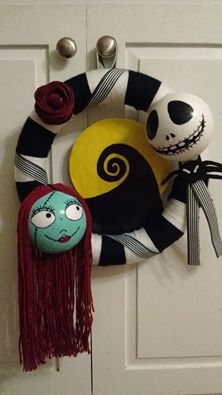
Disney’s The Nightmare Before Christmas is one of my all-time favorite movies. I like to watch it around Halloween, Christmas and… well… really any time. When I went to look online to see how much a NBC-themed wreath would cost me I could not justify the price. I decided to make my own. I received a lot of positive comments and friends asking for one as well. I would love to be able to make one for all those who asked. However, with my schooling consuming my evenings I would never be able to make them in time for this coming Halloween season (If you don’t mind waiting about a year, I can make that time frame work 😉 )
I figured I would do my best to give you all a tutorial. This is a first for me, so keep your expectations low. Please keep in mind I had to utilize pictures from the finished product as I did not have the forethought to digitally catalog my progress throughout the project.

Items Needed:
-12″ Foam Wreath Frame (can do larger if desired)
-Black Yarn ( I chose the smallest and cheapest skane available)
-White Yarn (same as above)
-Hot Glue Gun and Correspoding Glue Sticks
-(35) 22″ Pieces of Burgundy Yarn
-(1) 4″ Smooth Styrofoam Sphere (or (2) 2″ Spheres)
-(1) Piece of Black Felt
-Black Sharpie
-Burgundy (or Sally Lip color of your choice) Sharpie
-Yellow Sharpie/Yellow Paint
-Mod Podge
-Paintbrush
-Aqua Acryllic Paint
-Piece of Carboard
-Piece of 8.5×11 Piece of White Paper
-Blck/Wht Striped Ribbon
I go to Hobby Lobby and use the 40% off coupon on multiple trips for the best savings.
Steps: (as best as I can recall)
-On your wreath form measure and mark your sections. It may also help to write a “b” or “w” in each section to make sure you don’t end up with two “w(s)” or two “b(s)” next two one another.
-Wrap black and white yarn in an alternating fashion tightly around foam wreath form. You can secure the pieces with hot glue or scotch tape. I used the tape because at the time of this step of the project I was out of glue sticks and did not want to make a trip to the store.
-Cut the styrofoam ball in half (I’m going to be honest, I had my husband do this as everything I tried seemed very likely to end in the loss of a digit). You could also just use two smaller spheres (maybe 2″ or 3″)
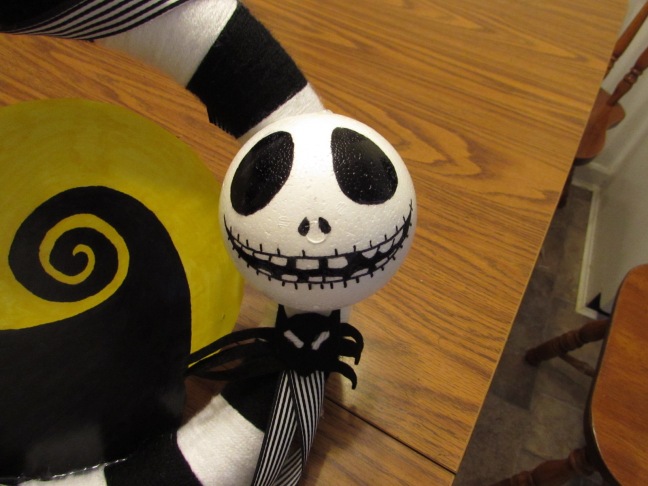
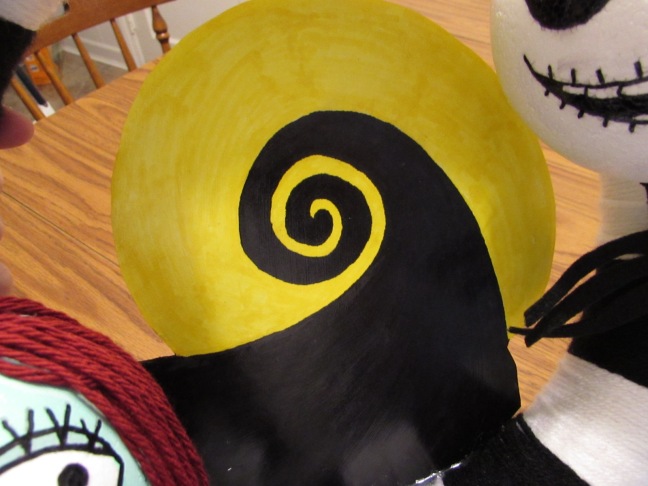
-Color one half with the black sharpie like the picture below ( I deifinitely recommend drawing it out with pencil first)
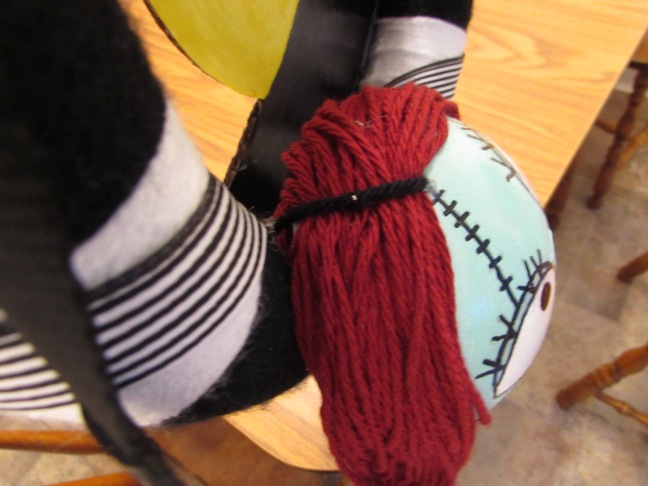
-Draw (with pencil) the following design on the second half
-Paint with aqua paint sparing the eye and lip areas
-When dried, lightly pencil the design onto painted sphere
-Use burgundy Sharpie to color in lip area
-Use black Sharpie to add the rest of the lined details


-Paint both spheres with Modge Podge when completely dry (If not, the marker will smear and you will momentarily hate your life)
-Take the burgundy yarn strings collectively and drape them in half. Take a small black ribbon and loosley tie in the middle. Hot glue the “hair” on top of the sphere (I pinned the “hair” while trying to glue so it would stay in place.
-I also used hot glue and glued some of the hair to the sides of her face to help them stay.
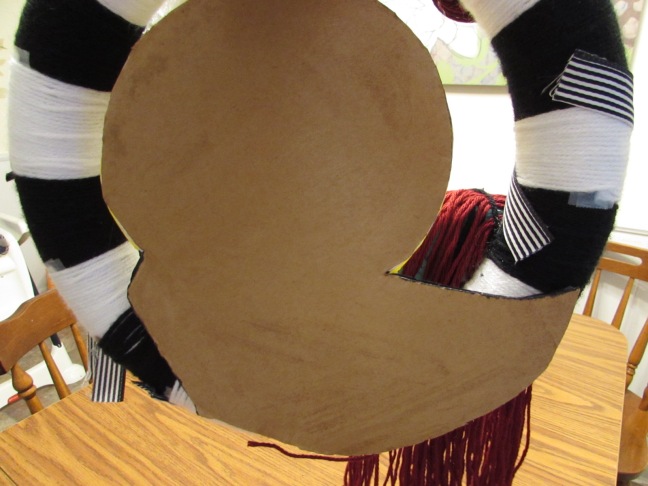
-Draw the moon and hill on a piece of white paper. Color in with either paint or markers.
-Glue page to spare peice of cardboard (I used one of my plethora of spare Amazon boxes)
-Cut out and modge podge when entirely dry
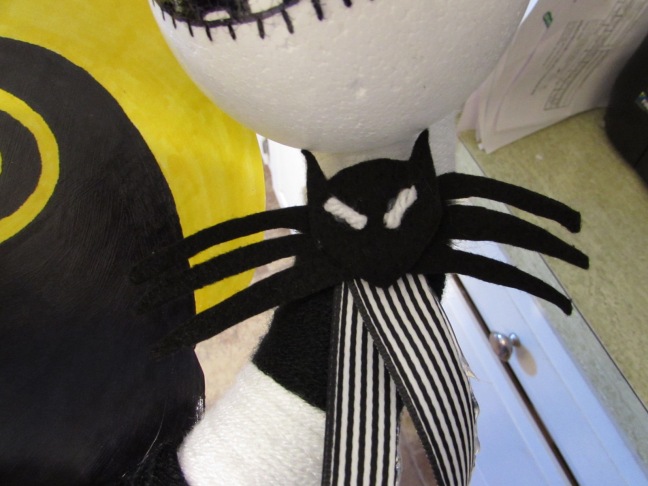
-Cut a piece of black felt to resemble the black bat tie. I used chalk to outline what I wanted and then cut.
-Hotglue two very small pieces of white yard onto the black bat tie
-Place two long sections of the striped ribbon behind the bat tie and hot glue it all together.
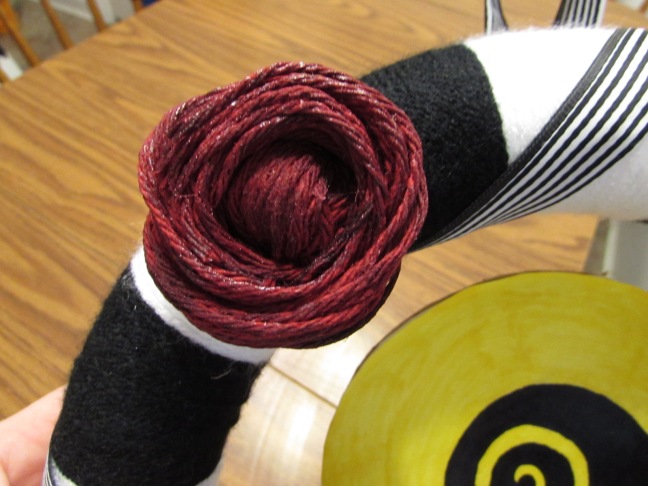
-The last part came about as an accident. I originally tried to create Sally’s hair by tying it in a knot and try to part it and place it on her head. It looked ridiculous. However, I took the long part of the yarn and wrapped it around the knot and voila a rose was born. It reminded of the scene of the burning flower so I decided to add it. I modge podged it to make sure it stayed together.
-You’re ready to start placing your pieces where you want them. Again I used straight pins to configure the placement and then hotglued.
-Lastly, I placed the striped ribbon intermittently around the wreath diagnonally and made a “hook” as well.

Ta da! That should do it.
Have fun and make any modifications you see fit!!!
(Respond in the comment section if you have any questions and with pictures of your own!! )